Lego, stop-motion and other tricks...
Well, it was a while ago when I shot a couple of Lego ‘remake’ commercials but since then they have gone on to win three Cannes Lions awards and multiple other advertising awards. For this reason I felt it was worth revisiting the job for those who have never shot Lego before or are simply Lego enthusiasts.
So, let’s be honest, if you’re asked to be the Director of Photography for a commercial where you can play with Lego all day, it’s really a no-brainer as to what your response should be… “HELL YES!!!”
What I didn’t realise, at that stage, was my duties would solely be to set up the camera and lighting. The Lego was out-of-bounds for everyone except the animators. This became very clear on the first day when even the director received a bollocking at his first attempt to touch the Lego… Strictly VERBOTEN!!! So, the whimsical Lego experience really wasn’t what I remembered as a kid… Yes, times were simpler then.
Anyway, here’s the back-story… We were asked to shoot two commercial spots for cinema. The commercials would play just before The Lego Movie but they had to be re-made entirely in Lego from existing commercials. There was a commercial for BT and one for Confused.com that we were assigned. Upon seeing the final product, they were so happy with the results they bought an entire commercial block during prime time television to promote the movie. To refresh your memory, here are the original commercials:
Here are our Lego remakes of those originals:
Now check out the split-screen comparison between the original and the Lego remakes:
Enter the very talented crew that made this possible…
Director: Jonas McQuiggin
Director of Photography: Me
Art Director / Animator: Michelle Sotheren
Animator / On-set VFX: Sam Kerridge
Post VFX: Ted Adair from Tilt Design
Jonas, the director, set up a few rules and, when I say a few rules, it was more like a dossier of parameters that would put a home loan contract to shame. Having said that, it really did establish a very focused attempt from every person to be absolutely true to the original commercials. This was the paramount premise with which we worked towards and, in my opinion, this was the reason the end result was so good.
After digesting the rules and regulations, we all set about planning and testing what we needed for the job.
PRE-PRODUCTION
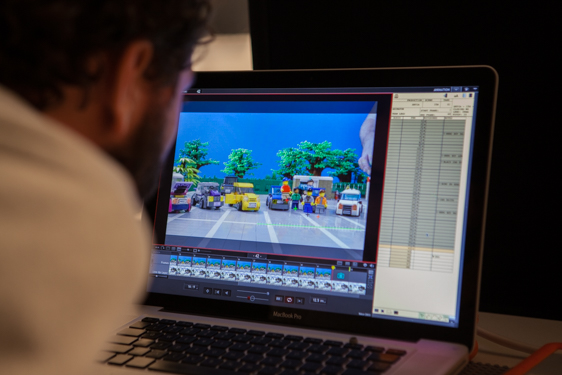
Probably the most important aspect of the shoot was the use of Dragonframe software. Jonas read the manual cover-to-cover about three times and became a pseudo-expert with the programme. Even at the end of the two weeks of shooting most of the power of the software was still left untapped with our relatively simple requirements but Jonas was continually discovering new capabilities of the software throughout the shoot.
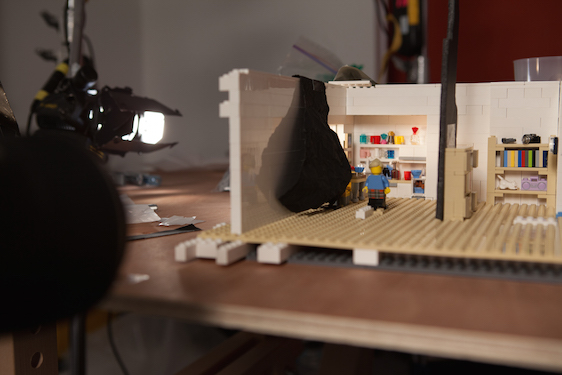
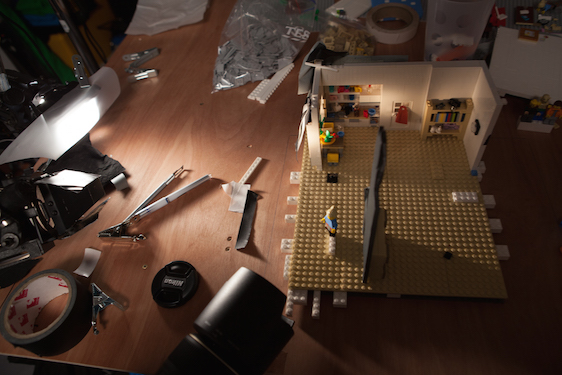
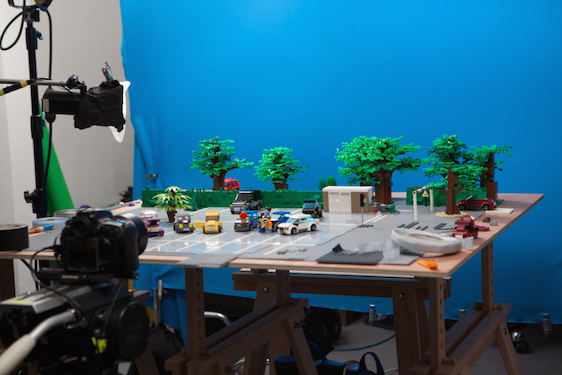
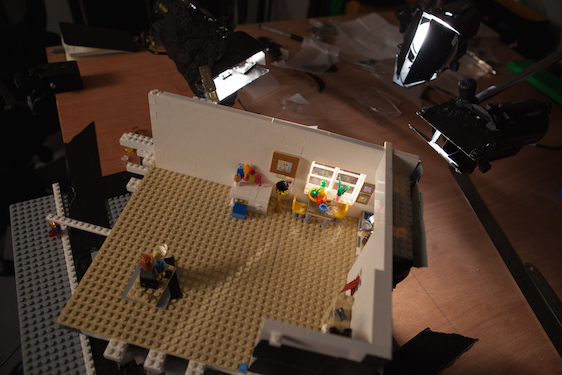
After a ridiculous shopping spree at the local Lego store, Michelle and Sam went about organising the Lego and building the sets. Why we had to buy Lego from the store you ask? That is a story for a pub session. The build process took five days but, by the end, both sets for the two commercials were in a good shooting state.
What became quite obvious, very quickly, was the abnormal sizing of the Lego figures with the smallest versions of the cars that could be built. We knew this could be cheated on the close-ups but the wide shots would show the size variation, making it difficult to match perspectives of the original commercials. Obviously, an option was to green screen the figures and reduce in post but, besides the extra hours in post that we didn’t have, we all felt it would take away from the comedic value of the Lego world that we know. The abnormal sizing is where a lot of the comedy lies so “in-camera as much as possible” became a mantra for the next two weeks.
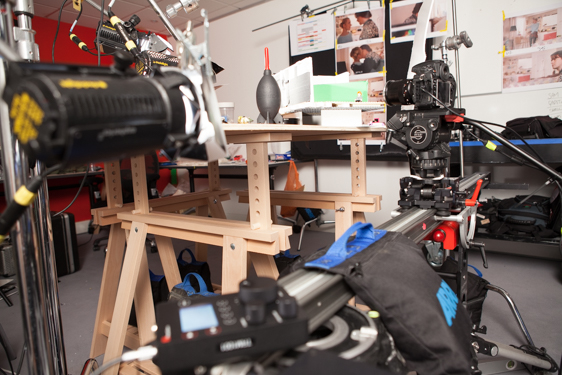
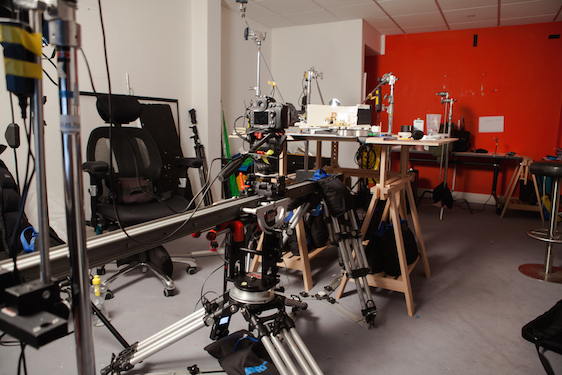
CAMERA & LIGHTING
Stop motion is often shot at either 12/12.5 or 15 frames per second. We did consider the option of shooting at 25fps but the increase in shooting time is quite considerable given that we had no more than 4 days per commercial to shoot everything. 18fps and 15fps were both considered but the obvious alternative was to shoot 12.5fps for acceptable animation movement and the shooting time available. The difference between 12.5fps and 15fps is not a lot for the small movements the commercials tended to have and there is a certain hilarity in the staccato movement of 12.5fps; to smooth that out would dilute the comic effect. Added to which, the already minuscule animation moves needed for some shots would have been quite ridiculously small and barely perceptible for the animators to deal with comfortably.
DEPTH OF FIELD
The next main question I needed to get my head around was the depth of field (DoF). I spent some time researching stop motion and even re-read articles such as the December 2009 edition of American Cinematographer magazine which featured a “fantastic” article on Fantastic Mr Fox. There was some good information on the stop motion side of things and some interesting notes on lens distortion. The difference to us was their animated characters were much larger in size than the miniature Lego pieces we were dealing with. Simply put… this was a stop motion miniatures shoot that would require serious macro shooting.
Anyone who has shot macro would know the major issue is depth of field. When the lens is so close to the subject, the depth of field is ridiculously shallow. For example, let’s look at a Lego figurine and how much f-stop I would need to keep it full frame and all in focus. Firstly, here are some basic estimates to work with and we’ll take it from there:
Lego figure’s name: Bruce (in honour of my Aussie upbringing)
Bruce’s Height: 40mm (4cm)
Bruce’s Depth: 10mm (1cm)
Camera: Nikon D800 (FX mode)
Lens: Zeiss ZF.2 Makro-Planar T2 50mm
Base f-stop: f/5.6
Distance to subject (for 100% fill): 80mm (8cm)
Field of View: 60mm x 40mm (6cm x 4cm)
With these specifications, the depth of field (DoF) would be a wapping 0mm! So, if Bruce were only 10mm deep, his entire body would not keep in focus except the very sliver of paintwork if shot front-on. The problems were obvious… Could we get a lens to focus as close as 80mm away and on-budget? If so, could we physically get the camera that close, allowing room for the animators? And finally, how many stops would we need to get any reasonable depth of field?
Having said that, there are plenty of Lego films out there shot by amateurs and I’m sure depth of field was never a major consideration. The difference was their films were shot on consumer “happy snap” cameras with small sensor sizes so their depth of field was always fairly deep due to the nature of the sensor. Obviously, my example was an extreme as we were hoping to use the Nikon D800 and the first consideration was to try for using the full sensor in FX (7360 x 4912) mode.
The main issue was the sensor size for DoF consideration. An idea was to shoot further away from the subject and reduce the fill size to a much smaller percentage of the FX sensor and that way we could compress the depth of field and, effectively, give us a deeper focus for macro shooting. The problem here was that Dragonframe software was using the “Live View” mode out of the camera and this was only at 640 x 480. The crop/blow-up we would need to view on a monitor made things so noisy it was impossible to make out any detail. We couldn’t work that way so that idea was kiboshed pretty quickly.
The other option was to look at DX (4800 x 3200) mode. DX mode is larger than a 4K (4096 x 2160) sensor which still offers 4 times the resolution of the HD as our final output. This would allow the ability to increase the distance away from the subject to make it more manageable for DoF. The bonus was for the animators who could work unhindered because the camera wasn’t on top of them.
If we could then fill only 25% of the DX frame and do an HD (1920 x 1080) crop, we could get in the range of 6mm to 7mm DoF quite comfortably, even with the closer shots. Now we’re starting to get somewhere. The original commercials were shot with a shallow DoF for a lot of the close-ups. Matching the DoF was done as a visual guess but I often took calculated guesses of the real distances (and subsequently the DoF via PCAM) in the original commercials by estimating the distances on screen and the focal length of the lens most likely used. This helped me translate what would have been shot in real life with what we were doing. It never really matches up with mathematical formulas when you’re guessing from the start but paying attention to the focus from the actor’s hat to the back of his ear, for instance, is a great discipline for a young Director of Photography to help in understanding lens aesthetics.
Probably worth mentioning was our use of focus stacking. It’s a standard macro photography technique to help deal with the shallow DoF. This works well for a single photograph and Adobe Photoshop but when you’re taking upwards of 600 photos for a 30-second TVC, it becomes very difficult to work that way. Getting the right DoF for each shot was paramount. We could focus stack on the wider shots where there were 3 or 4 definite layers to work with. It would be the VFX person’s job to comp the layers later. The opening of the Confused.com TVC is an example of this. In real life the girl to the right in the foreground is only slightly out of focus compared to what it would naturally be in a macro environment. In this case, focus stacking was essential to maintain the same lens feel of the wide in the original and to work within the constraints of macro.
LENSES
To get the right DoF for the Confused.com TVC, for example, it was clear to me we’d need a lot more light than you may think. Although a set of Dedos can be, and certainly were, a great tool for bench-top work, the ambient level needed to be considerably more. We were located in a standard office space so my largest source was a 2K tungsten light bounced in to some poly to simulate outdoor overcast daylight. To gain the DoF I needed and to keep from ultra long exposures that would increase noise and burn up shooting time, I often shot at f/16 and f/22, with the occasional f/32.
On a side note, I use f-stop over T-stop due to the nature of SLR still lenses and often I did notice an inconsistency between the lenses (eg. going from wide to tight) and, therefore, had to compensate with shutter or aperture corrections. There's a good article, “F-Stops vs T-Stops”, from focus puller James Leckey, that explains this to anyone who cares to understand the difference.
With a USB connection from the laptop running Dragonframe we were able to remotely control the shutter for exposure times from 2 to 4 seconds without worrying about bumping the camera. All I needed was a really solid tripod because we noticed on a simple photographic tripod that the shutter release actually moved the camera ever so slightly. So, enter my old Ronford-Baker 2030 tripod head and heavy-duty sticks. Complete overkill but the last thing we wanted was to shoot 34 frames, bump it and have to start over; our schedule was far too tight for a lot of re-shooting.


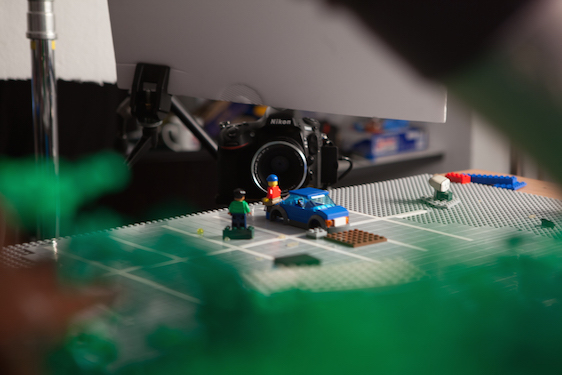
Lens choice was simple. I had a Zeiss ZF.2 50mm Makro-Planar T2 and we then rented a Nikon AFS 105mm f2.8 D G VR Micro. We also used a couple of wider lenses (24mm and 28mm) from the director’s personal stash and this allowed us to get the same perspective for the ultra wide shots. For example, moving the 50mm back, to cover the wide shot we needed, actually noticeably narrowed the angle-of-view and the difference of feel from the original commercial was too obvious. Moving to a 24mm gave the same aesthetic quality of the original commercial's wide-angle shot.
As mentioned before, we were very keen to use the Nikon D800 for the simple reason that we actually had one at no cost (budget was tight). Thankfully it’s definitely one of the better DSLR cameras out there anyway. I shot at 400 ISO as my research indicated this was a much better setting for noise on long exposure shots. Lower noise when exposing for 2 seconds at 400 ISO, for example, than only 1 second at 800 ISO. These aren’t particularly long exposures but it was the safer way to play it.
It’s probably worth noting that for every setup (ie. each set of shots) I recorded extensive notes on f-stop, distance to subject, height of camera, exposure time, lens type and shot size. This allowed us to come back to the setup if we ever needed. As it turned out, we did actually re-do a few shots from the start of the shoot, once we found our groove with the animation. Quick word of advice but after lighting the set, while you wait for the animators and director to work their magic, it’s really not the time to pick up a newspaper or catch up with Facebook. When on-set, I’m a strong believer in focusing on your job, even when you may not have too much to do at a given point and you’re waiting for other departments to do their jobs. After completing my note-taking, I would then watch the next shot of the original commercial and start analysing the detail of that shot. I probably watched the commercials 10 times more than all of the crew put together so that I knew each shots’ specific details. As a result of that discipline, I built up an extensive spreadsheet of data as we were going, in case we ever needed to refer back to certain shots and match them.
VFX
There were two aspects of the Lego shoot that stood out from the standard coverage. The first was on the Confused.com TVC; the robot character, named Brian, who is the face of the brand, is a real remote-controlled machine that is about two-thirds the size of a human being. The problem for us was the model builders could only build him to a size that was nearly three times the size of the Lego figures. This was the only time we had to use a green screen. We kept it simple and used a green card/fabric on the set and shot Brian’s moves as a separate pass for the wider shots. For close-ups of Brian, we cheated the background cars by bringing them closer in frame or something like that. When we could shoot in camera we did and, therefore, kept true to our original remit. The only caveat to all this was the background of the Confused.com commercial. We felt it was best to use a sky blue material that we could create the Lego look with later in post. To chase cloud movement on top of everything, with the time we had, would have been a stretch. We re-created the wind through the trees movement but felt the sky, being a flat plane, would have been full re-builds each time and not just simple adjustments.
STEADICAM
The other tricky shot was at the end of the BT commercial where there was clearly a Steadicam shot that pivoted around the couple and then tracked back while dipping down and then back up again. I was very keen to achieve the shot in-camera and to also make sure the flare from the sun was not done in post. I'd previously used a slider called Floatcam and knew it had a time lapse and stop motion capability. It is very rigid and extremely accurate. After a small test, I decided it would be quite suitable for a dolly move backwards and, if we kept it wide enough, the VFX could do a down and up move to match the Steadicam of the original. Unfortunately turnaround time for the job didn’t allow for it in the end but it certainly would have worked. Either way, the shot is very close to the Steadicam version and we were able to re-create the dynamic pivot move in the original commercial with the use of a primary Lego-made turntable for the set and then a secondary turntable for the characters as well. By countering their moves and combining it with a simple linear track back on the Floatcam we could replicate the dynamic Steadicam move, even to the point where the Steadicam operator nearly lost the characters out of frame. Added to which, by shooting a frame every 4 moves and then every 3 moves and then every 2 moves, etc, we were able to re-create the ramping effect of the Steadicam move in-camera. Also, with careful planning of the flare coming in at a certain point, I was also able to re-create the natural sun flare in-camera.
We made a policy that when we start on a shot we cannot leave the room for fear of even the smallest change affecting it. In lieu of that rule, that shot took all morning to set up and about 5 hours to shoot so at the end of the session there was certainly a full-on dunny run! (British translation: “rush to the toilet”)
Finally, if ever you decide to shoot Lego, I can only recommend a few things… Maintain patience, always have good music, good coffee and lots of mixed nuts to provide all the sustenance anyone ever needs.
EXTRA
‘Case Study’ video about the World’s First ALL LEGO TV Ad Block if you still want to nerd it up even more…